Basic Rules of Photography
Rule of Thirds :- Imagine that your image is divided into 9 equal segments by 2 vertical and 2 horizontal lines. The rule of thirds says that you should position the most important elements in your scene along these lines, or at the points where they intersect. Doing so will add balance and interest to your photo. Some cameras even offer an option to superimpose a rule of thirds grid over the LCD screen, making it even easier to use.
Balancing Elements :- Placing your main subject off-centre, as with the rule of thirds, creates a more interesting photo, but it can leave a void in the scene which can make it feel empty. You should balance the "weight" of your subject by including another object of lesser importance to fill the space.
Leading Lines :- When we look at a photo our eye is naturally drawn along lines. By thinking about how you place lines in your composition, you can affect the way we view the image, pulling us into the picture, towards the subject, or on a journey "through" the scene. There are many different types of line - straight, diagonal, curvy, zigzag, radial etc - and each can be used to enhance our photo's composition.
Symmetry and Patterns :- We are surrounded by symmetry and patterns, both natural and man-made., They can make for very eye-catching compositions, particularly in situations where they are not expected. Another great way to use them is to break the symmetry or pattern in some way, introducing tension and a focal point to the scene.
Viewpoint :- Before photographing your subject, take time to think about where you will shoot it from. Our viewpoint has a massive impact on the composition of our photo, and as a result it can greatly affect the message that the shot conveys. Rather than just shooting from eye level, consider photographing from high above, down at ground level, from the side, from the back, from a long way away, from very close up, and so on.
Background :- How many times have you taken what you thought would be a great shot, only to find that the final image lacks impact because the subject blends into a busy background? The human eye is excellent at distinguishing between different elements in a scene, whereas a camera has a tendency to flatten the foreground and background, and this can often ruin an otherwise great photo. Thankfully this problem is usually easy to overcome at the time of shooting - look around for a plain and unobtrusive background and compose your shot so that it doesn't distract or detract from the subject.
Depth :- Because photography is a two-dimensional medium, we have to choose our composition carefully to conveys the sense of depth that was present in the actual scene. You can create depth in a photo by including objects in the foreground, middle ground and background. Another useful composition technique is overlapping, where you deliberately partially obscure one object with another. The human eye naturally recognises these layers and mentally separates them out, creating an image with more depth.
Framing :- The world is full of objects which make perfect natural frames, such as trees, archways and holes. By placing these around the edge of the composition you help to isolate the main subject from the outside world. The result is a more focused image which draws your eye naturally to the main point of interest.
Cropping :- Often a photo will lack impact because the main subject is so small it becomes lost among the clutter of its surroundings. By cropping tight around the subject you eliminate the background "noise", ensuring the subject gets the viewer's undivided attention.
Experimentation :- With the dawn of the digital age in photography we no longer have to worry about film processing costs or running out of shots. As a result, experimenting with our photos' composition has become a real possibility; we can fire off tons of shots and delete the unwanted ones later at absolutely no extra cost. Take advantage of this fact and experiment with your composition - you never know whether an idea will work until you try it.
Composition in photography is far from a science, and as a result all of the "rules" above should be taken with a pinch of salt. If they don't work in your scene, ignore them; if you find a great composition that contradicts them, then go ahead and shoot it anyway. But they can often prove to be spot on, and are worth at least considering whenever you are out and about with your camera.
Abstract Photography

Abstract Photography is the photographic art that is not representational of real objects in the natural world. By taking the essence of the photo or a portion of the photo and by using color and or the form in an aesthetic arrangement or combination, the photographic abstraction becomes art.
Abstract photography is unlike most other types of photography - rules, such as composition and accurate focusing hold no values. The abstract photographer uses his creative imagination to create stunning works of art. Abstract photography is a popular form of art and the rewards for a good abstract photographer are most worthwhile. Art buyers pay large amounts for good abstract work. Abstract photography is a process of using colours and patterns combined to create an image, with no true meaning or no clear subject involved. Abstract photography is not necessarily going to mean the same thing to everyone. Abstract photography leaves more to the imagination and helps us concentrate on texture and colour rather than the whole subject. If you are looking to try a new form of photography, abstract photography will certainly be an enjoyable challenge and very rewarding if you master the true art.
Creating an abstract image can be easy - creating a great abstract image is difficult. One of the most simple ways of creating an abstract image is by using water and your cameras' shutter combined. Shooting fast flowing water, with a slow shutter speed of one second will give you a blur effect. This is quite simple to do, but will it look attractive? This will depend on light - shooting water with a slow shutter speed when the sun is low in the sky will give your image more attractive colours. Different films will also produce different colours. Adding colour filters will also improve your abstract photography. If you are using a digital camera, filters can be added later with Photoshop.
Using a slow shutter speed to shoot a flag blowing in the wind will also give you an abstract image. The trick to keeping abstract photography attractive when using your cameras' shutter is to crop tightly. Fill the view finder with the blur image.
Some kinds of macro photography can be considered as abstract. Closeups of flowers and other plant life will make great abstract subjects. As with shooting water - macro abstracts should be cropped tightly and the image should have a theme of colour. Some street lights can also create abstract photographs.
Every where we go we are surrounded with colour, textures and patterns. Patterns make for great abstract images. New patterns are formed by nature every day and this is the best place to start to create marketable abstract photographs.
Do You Get It?
Often people will say they just do not get abstract art when it is a painting. Abstract photography on the other hand has an entirely different effect on the audience. It almost has a magnetic challenge to the mind to figure out what it is. Or upon knowing what it is, being able to wrap the brain around the image of the photograph becomes the challenge.
Abstract Art Photography Form
Abstract photography can take several forms. The most common forms are...
The Abstraction of the Subject Matter
This involves seeing beyond the reality to see abstractions of photographic subject matter.
Abstraction of a Part of the Whole
Abstractions in photography can also include a part of the whole that in and of its self has some intrinsic artistic value. This requires stripping off other aspects of the photo.
Abstractions Within the Photo
It can include seeing things in the photograph that are not necessarily the substance of the photograph. It could be analogous to seeing images in clouds. These images are visible in the art of the photograph. Abstract photographic art is indeed a unique form of abstract art. It can be colorful, bright or dark and mysterious. It can move people. It has power.
I hope it does for you what it does for me in being able to share it with you.
Abstract photography is unlike most other types of photography - rules, such as composition and accurate focusing hold no values. The abstract photographer uses his creative imagination to create stunning works of art. Abstract photography is a popular form of art and the rewards for a good abstract photographer are most worthwhile. Art buyers pay large amounts for good abstract work. Abstract photography is a process of using colours and patterns combined to create an image, with no true meaning or no clear subject involved. Abstract photography is not necessarily going to mean the same thing to everyone. Abstract photography leaves more to the imagination and helps us concentrate on texture and colour rather than the whole subject. If you are looking to try a new form of photography, abstract photography will certainly be an enjoyable challenge and very rewarding if you master the true art.
Creating an abstract image can be easy - creating a great abstract image is difficult. One of the most simple ways of creating an abstract image is by using water and your cameras' shutter combined. Shooting fast flowing water, with a slow shutter speed of one second will give you a blur effect. This is quite simple to do, but will it look attractive? This will depend on light - shooting water with a slow shutter speed when the sun is low in the sky will give your image more attractive colours. Different films will also produce different colours. Adding colour filters will also improve your abstract photography. If you are using a digital camera, filters can be added later with Photoshop.
Using a slow shutter speed to shoot a flag blowing in the wind will also give you an abstract image. The trick to keeping abstract photography attractive when using your cameras' shutter is to crop tightly. Fill the view finder with the blur image.
Some kinds of macro photography can be considered as abstract. Closeups of flowers and other plant life will make great abstract subjects. As with shooting water - macro abstracts should be cropped tightly and the image should have a theme of colour. Some street lights can also create abstract photographs.
Every where we go we are surrounded with colour, textures and patterns. Patterns make for great abstract images. New patterns are formed by nature every day and this is the best place to start to create marketable abstract photographs.
Do You Get It?
Often people will say they just do not get abstract art when it is a painting. Abstract photography on the other hand has an entirely different effect on the audience. It almost has a magnetic challenge to the mind to figure out what it is. Or upon knowing what it is, being able to wrap the brain around the image of the photograph becomes the challenge.
Abstract Art Photography Form
Abstract photography can take several forms. The most common forms are...
- The abstraction of the subject matter
- Abstraction of a part of the photo or within the photo
- These can also be manipulated into colorful art abstractions
The Abstraction of the Subject Matter
This involves seeing beyond the reality to see abstractions of photographic subject matter.
Abstraction of a Part of the Whole
Abstractions in photography can also include a part of the whole that in and of its self has some intrinsic artistic value. This requires stripping off other aspects of the photo.
Abstractions Within the Photo
It can include seeing things in the photograph that are not necessarily the substance of the photograph. It could be analogous to seeing images in clouds. These images are visible in the art of the photograph. Abstract photographic art is indeed a unique form of abstract art. It can be colorful, bright or dark and mysterious. It can move people. It has power.
I hope it does for you what it does for me in being able to share it with you.
Macro Photography

Macro photography is close-up photography of usually very small subjects. The classical definition is that the image projected on the "film plane" (i.e., film or a digital sensor) is close to the same size as the subject.
In recent years, the term macro has been used in marketing material to mean being able to focus on a subject close enough so that when a regular 6×4 inch (15×10 cm) print is made, the image is life-size or larger.[citation needed] With 35mm film this requires a magnification ratio of only approximately 1:4, which demands a lower lens quality than 1:1. With digital cameras the actual image size is rarely stated, so that the magnification ratio is largely irrelevant; cameras instead advertise their closest focusing distance.
Macroscopy competes with the digital microscope where a small camera tube can be attached directly to a computer, usually via USB port. Macroscopy also competes with photo microscopy, and it is much less expensive to achieve high quality images. However, high magnification images are more difficult using macroscopy.
The method is especially useful in forensic work, where small details at crime or accident scenes may often be very significant towards solving the crime. Trace evidence such as fingerprints and skid marks are especially important, and easily recorded using macroscopy. Fracture surfaces from broken products are very revealing using fractography, especially when photographed using glancing light to highlight surface details.
Japanese Anemone (Anemone hupehensis var. japonica)Compact digital cameras and small-sensor bridge cameras have an incidental advantage in macro photography due to their inherently deeper depth of field. For instance, some popular bridge cameras produce the equivalent magnification of a 420 mm lens on 35-mm format but only use a lens of actual focal length 89 mm (1/1.8″-type CCD) or 72 mm (1/2.5″-type CCD). (See crop factor.) Since depth of field appears to decrease with the actual focal length of the lens, not the equivalent focal length, these bridge cameras can achieve the magnification of a 420 mm lens with the greater depth of field of a much shorter lens. High-quality auxiliary close-up lenses can be used to achieve the needed close focus; they function identically to reading glasses. This effect makes it possible to achieve very high quality macrophotographs with relatively inexpensive equipment, since auxiliary closeup lenses are cheaper than dedicated SLR macro lenses.
LightingThe problem of sufficiently and evenly lighting the subject can be difficult to overcome. Some cameras can focus on subjects so close that they touch the front of the lens. It is impossible to place a light between the camera and a subject that close, making extreme close-up photography impractical. A normal-focal-length macro lens (50 mm on a 35 mm camera) can focus so close that lighting remains difficult. To avoid this problem, many photographers use telephoto macro lenses, typically with focal lengths from about 100 to 200 mm. These are popular as they permit sufficient distance for lighting between the camera and the subject.
Ring flashes, with flash tubes arranged in a circle around the front of the lens, can be helpful in lighting at close distances. Ring lights have emerged, using white LEDs to provide a continuous light source for macrophotography.
Homemade flash diffusers made out of white Styrofoam or plastic attached to a camera's built-in flash can also yield surprisingly good results by diffusing and softening the light, eliminating specular reflections and providing more even lighting.
In recent years, the term macro has been used in marketing material to mean being able to focus on a subject close enough so that when a regular 6×4 inch (15×10 cm) print is made, the image is life-size or larger.[citation needed] With 35mm film this requires a magnification ratio of only approximately 1:4, which demands a lower lens quality than 1:1. With digital cameras the actual image size is rarely stated, so that the magnification ratio is largely irrelevant; cameras instead advertise their closest focusing distance.
Macroscopy competes with the digital microscope where a small camera tube can be attached directly to a computer, usually via USB port. Macroscopy also competes with photo microscopy, and it is much less expensive to achieve high quality images. However, high magnification images are more difficult using macroscopy.
The method is especially useful in forensic work, where small details at crime or accident scenes may often be very significant towards solving the crime. Trace evidence such as fingerprints and skid marks are especially important, and easily recorded using macroscopy. Fracture surfaces from broken products are very revealing using fractography, especially when photographed using glancing light to highlight surface details.
- Using a lens specifically designed for close work and with a long barrel for close focusing, called a macro lens. Some manufacturers call it a micro, which might actually be scientifically more accurate, but can be confusing, since it goes against the established convention. These lenses provide consistently high optical quality when taking macrophotographs since they continuously change their optical formula as the lens focuses closer. They can also (generally) focus to infinity as well, and in most cases provide excellent optical quality when used for normal photography, although a macro lens might be optimized to provide its best performance at a magnification of 1:1. Some macro lenses, such as the Canon MP-E 65 mm f/2.8, can achieve higher magnification – up to 5:1 macro, enabling photography of the structure of small insect eyes, snowflakes, and other minuscule but detailed objects. However, "standard" (1:1) macro lenses are more common, and many of these find frequent use for general photography because of their excellent optics. There are different categories of macro lenses, depending on the focal length:
- 50–60 mm range typically used for product photography and small objects
- 90–105 mm range the standard focal range used for insects, flowers, small objects
- 150–200 mm range gives more working distance — typically used for insects and other small animals
- a few zooms provide a macro option, but they generally do not allow a 1:1 magnification
- Extending the distance between the lens and the film or sensor by inserting either extension tubes or a continuously adjustable bellows, with no optical components; between the camera body and the lens. The further the lens is from the film or sensor, the closer the focusing distance, the greater the magnification, and the darker the image for the same aperture. Tubes of various lengths can be stacked, decreasing lens-to-subject distance and increasing magnification. Bellows or tubes must be removed for normal working at longer distances. They can be used in conjunction with some other techniques (e.g., reversing the lens).
- Placing an auxiliary close-up lens in front of the camera's taking lens. Inexpensive screw-in or slip-on attachments provide close focusing at very low cost. The quality is variable, with some two-element versions being excellent while many inexpensive single element lenses exhibit chromatic aberration and reduced sharpness of the resulting image. This method works with cameras that have fixed lenses, and is commonly used with bridge cameras. These lenses add diopters to the optical power of the lens, decreasing the minimum focusing distance, and allowing the camera to get closer to the subject.
- Employing the Scheimpflug principle to change the plane of focus at the image plane relative to the subject plane, thereby increasing effect depth-of-field for a given lens aperture. Requires use of a specialized lens that allows the optical section to be pivoted off center. Examples are TS lenses from Nikon, Canon, and other manufacturers, and products like the LensBaby and Zoerk Multi Focus System. Traditional view cameras with bellows systems and / or tilting backs also permit plane-of-focus adjustment. Because of the very narrow depth-of-field available in macro photography, and the consequent need to stop down the lens as far as possible to obtain adequate depth-of-field, employing the Scheimpflug effect allows both increased depth-of-field and the ability to make more use of existing lighting conditions. The ability to work at a relatively larger aperture and control depth-of-field, is one potential benefit of this equipment and technique.
- Attaching a telephoto extender between the camera body and the lens. A 1.4× or 2× teleconverter gives a larger image, adding macro capabilities. As with an extension tube, less light will reach the film or sensor, and a longer exposure time will be needed. However, working distance remains the same as without the teleconverter.
- Reversing the lens using a "reversing ring". This special adapter attaches to the filter thread on the front of a lens and makes it possible to attach the lens in reverse. Excellent quality results up to 4x lifesize magnification using fairly cheap, "standard" (not specially designed for macro) lenses can be produced. For cameras with all-electronic communications between the lens and the camera body, such as Canon EOS, reversing rings are available which allow all camera functions, including open aperture metering, to be used. When used with extension tubes or bellows a relatively cheap but highly versatile macro system can be assembled. This is done not to improve the magnification but to improve image quality; since standard lenses are optimized to focus the light from a distant subject onto a nearby film plane, reversing the lens in the circumstance where the object is closer than the film plane will improve image fidelity.
- Reversing a lens of lesser focal length in front of a normally mounted lens using an inexpensive macro coupler, which screws into the filter threads on the front of the two lenses to join them mechanically. This method allows most cameras to maintain the full function of electronic communication with the normally mounted lens for features such as open-aperture metering. Magnification ratio is calculated by dividing the focal length of the normally mounted lens by the focal length of the reversed lens (e.g., when an 18 mm lens is reverse mounted on a 300 mm lens the magnification ratio is 16:1). The use of automatic focus is not advisable if the first lens is not of the internal-focusing type, as the extra weight of the reverse-mounted lens could damage the autofocus mechanism. Working distance is significantly less than the original lens. This amounts to using a lens normally used as a main photographic objective as an auxiliary lens.
- Depth of field is extremely small when focusing on close objects; a small aperture (high f-number) is often required to ensure sufficient depth of field. This requires either a slow shutter speed or bright lighting for correct exposure; in all but the brightest natural lighting if a prolonged exposure is not advisable, auxiliary lighting (such as from a flash unit) is required. Uniform lighting can be difficult with subjects very close to the lens; a ring flash mounted on the front of the lens can provide even illumination. Good results can also be obtained by using a flash diffuser, which can be made of inexpensive Styrofoam.
Japanese Anemone (Anemone hupehensis var. japonica)Compact digital cameras and small-sensor bridge cameras have an incidental advantage in macro photography due to their inherently deeper depth of field. For instance, some popular bridge cameras produce the equivalent magnification of a 420 mm lens on 35-mm format but only use a lens of actual focal length 89 mm (1/1.8″-type CCD) or 72 mm (1/2.5″-type CCD). (See crop factor.) Since depth of field appears to decrease with the actual focal length of the lens, not the equivalent focal length, these bridge cameras can achieve the magnification of a 420 mm lens with the greater depth of field of a much shorter lens. High-quality auxiliary close-up lenses can be used to achieve the needed close focus; they function identically to reading glasses. This effect makes it possible to achieve very high quality macrophotographs with relatively inexpensive equipment, since auxiliary closeup lenses are cheaper than dedicated SLR macro lenses.
LightingThe problem of sufficiently and evenly lighting the subject can be difficult to overcome. Some cameras can focus on subjects so close that they touch the front of the lens. It is impossible to place a light between the camera and a subject that close, making extreme close-up photography impractical. A normal-focal-length macro lens (50 mm on a 35 mm camera) can focus so close that lighting remains difficult. To avoid this problem, many photographers use telephoto macro lenses, typically with focal lengths from about 100 to 200 mm. These are popular as they permit sufficient distance for lighting between the camera and the subject.
Ring flashes, with flash tubes arranged in a circle around the front of the lens, can be helpful in lighting at close distances. Ring lights have emerged, using white LEDs to provide a continuous light source for macrophotography.
Homemade flash diffusers made out of white Styrofoam or plastic attached to a camera's built-in flash can also yield surprisingly good results by diffusing and softening the light, eliminating specular reflections and providing more even lighting.
Portfolio Photography
A face devoid of love or grace,
A hateful, hard, successful face,
A face with which a stone
Would feel as thoroughly at ease
As were they old acquaintances,--
First time together thrown.
-- "A Portrait" by Emily Dickinson
There are two elements to a photo studio for portrait photography. One is a controlled background. You want to focus attention on your subject and avoid distracting elements in the frame. Probably the best portraits aren't taken against a gray seamless paper roll. On the other hand, you are unlikely to screw up and leave something distracting in the frame if you confine yourself to using seamless paper or other monochromatic backgrounds. You don't have to build a special room to have a controlled background. There are all kinds of clever portable backdrops and backdrop supports that you can buy or build. If you absolutely cannot control the background, the standard way to cheat is to use a long fast lens, e.g., 300/2.8. Fast telephoto lenses have very little depth of field. Your subject's eyes and nose will be sharp. Everything else that might have been distracting will be blurred into blobs of color.
There are some pretty reasonable portable flash kits consisting of a couple of lights, light stands, and umbrellas. These cost $500-1000 and take 20 minutes or so to set up on location. If you don't have the money, time, or muscles to bring a light package to a project, the standard way to cheat is to park your subject next to a large window and put a white reflecting card on the other side. Don't forget the tripod because you'll probably be forced to use slow shutter speeds.
Stealing a LocationWhat if you don't have a big open space with diffuse light and a neutral background? Steal one. If you live in the United States, a vast open space with light pouring in from expensive skylights is as close as your nearest art museum or university. With a 200mm lens set to f/2.8, the background will be thrown out of focus. Here are some examples from the Boston Museum of Fine Arts and a couple of lobbies at MIT, taken on a cold February day in Boston. Canon EOS-5D, 70-200/2.8 IS lens, handheld without flash.
With a Canon or Nikon, most professionals end up using their 70-200/2.8 or 80-200/2.8 zooms as portrait lenses. These 3 lb. monsters aren't very pleasant to handhold, though, and if you know that you're only going to do portraits, you're better off with a prime lens. Prime lenses are lighter and give better image quality. Unfortunately, the prime lens in this range that a serious photographer is most likely to own is the 100 or 105 macro. These are very high quality optically but difficult to focus precisely since most of the focusing helical precision is reserved for the macro range. Here are some great portrait lenses:
- Canon EF 85mm f/1.2L II USM, (compare prices) (review) or, if you're on a budget, Canon EF 85mm f/1.8 USM, (compare prices) (review)
- Canon EF 100mm f/2 USM, (compare prices) (review)
- Canon EF 135mm f/2L USM, (compare prices)
- Nikon 85mm f/1.4D AF Nikkor, (compare prices) or Nikon 85mm f/1.8D AF Nikkor, (compare prices)
- Nikon 105mm f/2.0D AF DC-Nikkor, (compare prices)
- Nikon 135mm f/2.0D AF DC-Nikkor, (compare prices)
- Canon EF 50mm f/1.8 II, (compare prices) (review) or, if you're feeling rich, Canon EF 50mm f/1.4 USM, (compare prices) (review)
- Nikon 50mm f/1.8D AF Nikkor, (compare prices)
The lens starts as a modern prime telephoto lens, lighter than a zoom, high in contrast, and reasonably high quality, especially stopped down to f/5.6 or smaller. What is different about this lens is that, with the twist of a ring, you can vary the softness from none to rather soft. The photo at right is luminous in a way that is tough to explain and would be difficult to reproduce in Photoshop. Sadly, Canon has not updated this lens with an ultrasonic motor, which would allow simultaneous manual and auto focus. If you're only going to own one prime telephoto lens, the 100/2 USM or 135/2L USM are probably better choices.
As far as doing soft focus in other formats, Rodenstock makes an Imagon lens for 4x5 view cameras. This unusual lens has perforated disks that you slide into the middle of the lens. Unfortunately, different softness and aperture settings affect the focus, which requires focussing with the lens stopped down. In medium format, people like the old Zeiss 150 lens for Hasselblad because it simply isn't all that sharp.
For a serious challenge to digital SLR quality, start with a Hasselblad and a 150mm lens. If you have a flotilla of assistants like Annie Liebowitz, you could use the camera she uses: Mamiya RZ67. If you have a lot of patience, a 4x5 view camera with 270mm lens isn't a bad option.
How important is the choice of camera? Consider how terrible the pictures were that your relatives sent you back in the old days, taken with a zoom point and shoot film camera. The lenses was far too slow at the telephoto end. So the photo was taken at f/10 instead of f/2.8 and the background was sharp instead of blurry. Due to the slow aperture, Uncle Alfred had to use the on-camera flash instead of natural light. It was a waste of film.
How much better is life in the digital point and shoot age? Sadly, not much. The lenses are a little faster than on the old film P&S cameras, but the sensors are so small that the focal lengths are shorter and the depth of field is about the same, i.e., too great. The background is sharp when it should be blurry.
Note that with environmental portaits, you don't necessarily use a "portrait-length" lens. In fact, often a wide angle lens of some kind is used, typically closer to 35mm than 20mm (full-frame/35mm film).
Birds Photography Essentials
Bird photography is perhaps the hardest form of wildlife photography. You have to be stealthy, you have to be able to understand their behaviour, you have to have super-quick reactions and above all, you have to have patience. What follows is a guide to the basic skills and techniques you’ll need to have to be a successful bird photographer.
Gear
Most birds are skittish and shy, so you’ll need to have the right gear before you can get any good photos of them. A DSLR (Digital Single-Lens Reflex) with a fast drive mode of 3.5fps or above and advanced focusing system with nine or more points is a must. You’ll need these to get sharp action shots. You’ll need a fast lens which is 300mm or more. Any smaller than that and you’ll have a lot of trouble getting close enough to the birds for frame-filling pictures. Try and get the fastest lens you can afford – f/5.6, f/4, or even better, f/2.8. The faster the lens, the sharper your shots. Finally, a good sturdy tripod, which can support all your gear, will be invaluable when spending a long time in the field.
Where to go
Any area with a large expanse of woodland, where you’ll have a good chance of seeing many birds such as Chaffinches, Woodpeckers and Blue Tits, grassland, where Red Kites, Skylarks, Pheasants and many other birds reside, and wetlands which attract huge flocks of birds such as Lapwing and Avocets will be a great place to go looking for potential subjects.
There are also many nature reserves with bird-watching hides which are perfect for getting stunning close-ups and action shots. You can go on to the RSPB website to find any good bird spots near where you live. Coastal regions are also fantastic places to photograph birds. The vast expanses of mud at low-tide, which crawl with invertabrates, attract many species such as the Curlew and Oystercatcher.
Useful Techniques
Be Original
Use the Light.
Photography is all about capturing light, so don’t forget to use it to your advantage. If it’s a bright sunny day then use the harsh shadows it will create to take moody and atmospheric shots. Alternatively use the strong light for a back-lit effect; from the correct position you can get a beautiful rim of light around the bird. Bright light also means fast shutter-speeds, which in turn, mean action-freezing shots are to be had. Try to capture photos of birds in flight or of birds landing on water where the spray will be suspended in mid-air in the final image.
On the other hand, the soft, diffused light on cloudy days is perfect for capturing the vibrant plumage of birds, simple, natural portraits and detail-filled abstracts.
There are so many original shots of birds which have yet to be taken, so get out there and capture them!
Gear
Most birds are skittish and shy, so you’ll need to have the right gear before you can get any good photos of them. A DSLR (Digital Single-Lens Reflex) with a fast drive mode of 3.5fps or above and advanced focusing system with nine or more points is a must. You’ll need these to get sharp action shots. You’ll need a fast lens which is 300mm or more. Any smaller than that and you’ll have a lot of trouble getting close enough to the birds for frame-filling pictures. Try and get the fastest lens you can afford – f/5.6, f/4, or even better, f/2.8. The faster the lens, the sharper your shots. Finally, a good sturdy tripod, which can support all your gear, will be invaluable when spending a long time in the field.
Where to go
Any area with a large expanse of woodland, where you’ll have a good chance of seeing many birds such as Chaffinches, Woodpeckers and Blue Tits, grassland, where Red Kites, Skylarks, Pheasants and many other birds reside, and wetlands which attract huge flocks of birds such as Lapwing and Avocets will be a great place to go looking for potential subjects.
There are also many nature reserves with bird-watching hides which are perfect for getting stunning close-ups and action shots. You can go on to the RSPB website to find any good bird spots near where you live. Coastal regions are also fantastic places to photograph birds. The vast expanses of mud at low-tide, which crawl with invertabrates, attract many species such as the Curlew and Oystercatcher.
Useful Techniques
- Study their behaviour and familiarise yourself with it. Once you have done this you will be able to predict their next move and thus have a much higher chance of getting some awesome shots.
- Get within their circle of fear – this “circle” varies between birds, for example: you’ll usually be able to get within 3m of a Robin before it flies off, whereas you’ll be unlikely to get closer than 30m to a Kestrel. Good ways of getting within this circle is by going into a hide; shooting from your car; putting out food to attract the birds closer; going to a place where the bird likes to sit and then accustoming it to you through frequent visits of the area.
- Get down to their eye-level for a more intimate point-of-view.
- Look for clean backgrounds with no elements such as a white flower which will distract from the bird in the final image.
- Wear dark clothes (or white in snowy conditions), and cover your hands and face which will stand out and might scare off the bird.
Be Original
- Try and take some unique and original photos such as the silhouette of a Gull against a sunset background or a Peregrine Falcon swooping on a flock of Starlings.
- Look for unusual point-of-views, poses and compositions that will immediately grab the viewer.
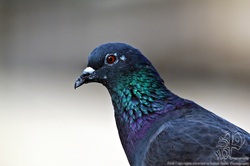
- Get in close for abstracts of the intricate patterns and magnificent colours in plumage which many birds possess, or focus on the eyes which often are amazingly coloured and marked.
Use the Light.
Photography is all about capturing light, so don’t forget to use it to your advantage. If it’s a bright sunny day then use the harsh shadows it will create to take moody and atmospheric shots. Alternatively use the strong light for a back-lit effect; from the correct position you can get a beautiful rim of light around the bird. Bright light also means fast shutter-speeds, which in turn, mean action-freezing shots are to be had. Try to capture photos of birds in flight or of birds landing on water where the spray will be suspended in mid-air in the final image.
On the other hand, the soft, diffused light on cloudy days is perfect for capturing the vibrant plumage of birds, simple, natural portraits and detail-filled abstracts.
There are so many original shots of birds which have yet to be taken, so get out there and capture them!
Low Light Photography Essentials

Low light photography is not necessarily just night photography, as many people assume. There could be different amounts of light coming from various sources and whatever is less than daytime light outside, I consider low-light. Indoors photography without much ambient light (as in many of our homes) as well as the light that is barely visible to our eyes at night, is also considered to be low-light. In this article, I will provide tips on how to take pictures in various low-light environments, whether indoors or outdoors.
Three levels of low-lightBefore we go any further, let’s first identify the varying levels of low-light and categorize them, so that we could refer to them in examples. Although it is very hard to categorize the amount of light, due to the fact that it is a long range of light between very bright and pitch black, just for the sake of making it easier to explain and refer to, I still decided to divide it into three categories:
1) Low light photography: Visible ConditionsHave you had a situation where you were in a shadow during the day and tried to take a picture? This was one of my frustrations when I bought my first DSLR, because I couldn’t understand why my pictures were coming out blurry. At times, the images on the rear LCD of the camera would look OK, but when I eventually viewed them on the computer screen, they would all be a little blurry. I had no idea why it was happening and really needed to find out why.
As I later found out, apparently, our eyes can see a much broader range of light, which is known as “dynamic range” in photography, than our cameras do. Therefore, even though you might think that there is plenty of light when you are in a shadow area, in fact, there might be inadequate light for the camera to effectively capture the image. Depending on your camera settings, there might be two consequences: a) you will have a blurry image and b) you might have a lot of noise in your image.
1.1) Shoot at higher shutter speeds to avoid blurry imagesSo, why do blurry images happen? The answer is in the camera shutter speed. If the shutter speed is too low, you will get camera shake and/or motion blur from moving subjects. To avoid camera shake, you should always try to shoot at faster shutter speeds. You might ask “what is a fast shutter speed?”. It depends on the focal length of your lens. If you are photographing a subject with a wide-angle lens between 10-24mm, you might get away with shutter speeds under 1/50th of a second, depending on your camera hand-holding technique. If you are using a telephoto lens longer than 100mm, I recommend applying the hand-holding ruleto calculate your optimal shutter speed. For most day-to-day photography, a shutter speed of 1/200th-1/250th of a second should be fast enough to yield sharp results and avoid motion blur.
1.2) Decrease your aperture to the lowest number (f/stop)But to shoot at fast shutter speeds such as 1/200th of a second means that you need to have plenty of light. In our situation, we don’t have enough light, so what do we do? The first thing you will need to try to do is decrease your lens aperture to the lowest number on the camera. Decreasing your aperture means more light will pass through the lens into the camera body, which will allow you to shoot at faster shutter speeds. In order to do that, you would have to either switch to “Aperture Priority” mode or manually override your aperture in whatever mode you are using. Then, start lowering your aperture till you get to the lowest number your camera will allow.
1.3) Use a faster lensThe lowest number depends on the speed of your lens. Most consumer zoom lenses are limited to f/3.5 for maximum aperture, while professional zoom lenses have an aperture of f/2.8 and some prime (fixed) lenses can go all the way to f/1.2. How will decreasing aperture affect your shutter speed? Let’s say you were shooting at f/8.0 aperture and 1/125th shutter speed. Decreasing aperture to f/5.6 will double your shutter speed to 1/250th of a second, while lowering it to f/4.0 will quadruple the shutter speed to 1/500th of a second, which is plenty to freeze motion. If you have a fast lens with a maximum aperture of f/1.4 or f/1.8, just keep in mind that decreasing the aperture to the lowest number will also decrease the depth of field, so you will have to make sure to acquire correct focus before you take a picture. If you shoot Nikon, I recommend getting one of the following prime lenses, depending on your budget: Nikon 50mm f/1.4G, Nikon 50mm f/1.8Dand Nikon 35mm f/1.8G (DX only). There is a similar selection for Canon Canon cameras: Canon EF 50mm f/1.4 USM, Canon EF 50mm f/1.8 II, Canon EF 28mm f/1.8 USM.
1.4) Use a lens with VR/IS technologyDoes your lens have VR (Vibration Reduction) or IS (Image Stabilization)? If no, that’s too bad, because VR/IS truly does work! The latest “VR II” technology by Nikon can allow you to shoot up to 4 times slower when it comes to shutter speed without adding any blur to the picture (realistically, it’s more like 3 times) compared to non-VR lenses. So, let’s say that with a regular lens you need 1/250th of a second to get a sharp picture. With a VR/IS system, you could lower the shutter speed all the way to 1/30th of a second or more and still get the same sharp image! Many of the consumer zoom lenses such as Nikon 18-55mm f/3.5-5.6G VR and Nikon 18-200mm f/3.5-5.6G VR II come with VR technology. While it is certainly nice to have VR in such versatile lenses, unfortunately, these lenses are also slower and not as sharp as prime lenses such as the Nikon 50mm f/1.4G. Zoom lenses with a fixed aperture and VR/IS technology are professional, expensive lenses such as the Nikon 70-200mm f/2.8G VR II (read my Nikon 70-200mm VR II review) pictured below and are also great choices for low-light photography.
1.5) Increase your camera ISOWhat if you have already decreased your aperture to the lowest number and you are still getting slow shutter speeds? The answer then is to increase the camera ISO (sensor sensitivity), to make the sensor collect light faster. If you are shooting at ISO 100 and your camera is telling you that the shutter speed is 1/25th of a second, you will need to increase your ISO to 400 to get the shutter speed of 1/100th of a second. How did I calculate that? Basically, doubling your ISO doubles your shutter speed. So, increasing the camera ISO from 100 to 200, increases your shutter speed from 1/25th of a second to 1/50th of a second. Then, increasing it further more from 200 to 400 increases the shutter speed from 1/50th of a second to 1/100th of a second. Technically, the shutter speeds in the cameras a little different (1/30th, 1/60th and 1/125th of a second), but I used the above numbers to make it easier to understand. The main thing to remember, is that doubling ISO doubles your shutter speed.
Be careful with increasing your ISO to a big number, as higher sensor sensitivity means that more grain/noise will appear in your images. Most modern cameras can handle noise levels up to ISO 800 pretty well, while top-of-the-line full frame professional cameras can produce very little noise even at ISO 3200 and above.
2) Low light photography: Low Light ConditionsLet’s now move on to a more complex situation, where the amount of light is quickly diminishing after sunset or you are shooting indoors in a poorly lit environment. Obviously, the first thing to try is to decrease your aperture and increase your ISO, as it says above. But then you get to the point where you are maxed out on the aperture and have already reached ISO 800 and you are still not able to get sharp photos. What do you do then?
2.1) Stand closer to the light sourceThe closer you are to the light source, the more light there will be for your camera to use. Large windows are great sources of light, so open up those curtains and blinds and let the light get into the room. I forgot to bring the flashes when we were photographing the below group, so we quickly found a solution by opening up a large gate and letting lots of exterior light in.
2.2) Stabilize yourselfThat’s right – learn to stabilize yourself and hold your camera better. Use your left hand to support the camera by putting it with your palm facing up in between the camera lens and the camera body (or wherever the center of the weight is). Pull your elbows towards your body. If you can, sit down with your right knee on the ground and use your left leg as support by resting your left arm on it. Gently squeeze the shutter button and see if you can get a sharp image. Practice this and other techniques and you will be able to shoot at very low shutter speeds without introducing camera shake.
2.3) Push your ISO to a higher numberWhat is better, a blurry image or a sharp image with more noise? I prefer the latter. Push your ISO to a higher number and take a shot. See if the level of noise is acceptable to you. There are plenty of noise-removal programs out there such as Noise Ninja that can help you clean up an image. Try them out and see if the final result after post-processing is good enough for your needs. Although I personally try to stay below ISO 800, sometimes I push mine to ISO 1600 or even 3200, when needed. On my full-frame Nikon D700 body, I can push up ISO to 6400 every once in a while.
2.4) Shoot in RAW mode and slightly underexposeI personally always shoot in RAW, because I can recover some detail from a picture if I overexpose or underexpose it. With a JPEG image, you have very limited options to recover an image. In some cases, I intentionally underexpose an image by using the exposure compensation button, which increases camera shutter speed. I typically allow 1-1.5 stops of negative exposure compensation…anything above that might not allow me to recover the details I need. Try it – it really works! Some photographers give advice to bracket exposures, but I personally prefer to use exposure compensation instead.
2.5) Be careful about autofocusIn low-light environments, the camera might start to lose its autofocus capabilities. That’s what happens when there is not enough light – the camera cannot differentiate between objects anymore, just like if you were to point it at a plain white wall. Many DSLR cameras are equipped with an “AF assist” light in front of the camera that lights up just like a flashlight when there is not enough light to illuminate the subject. If you have such functionality, definitely turn it on in dim environments. On Nikon DSLRs, switch your camera from continuous mode (“C”) to single (“S”) mode to turn on this feature. When you focus on a subject, make sure that it looks sharp in the viewfinder. If it is blurry, try to re-acquire focus by half-pressing the shutter/autofocus button. In many cases you won’t be able to tell if the camera was able to focus correctly on the subject until you take the picture. In that case, make sure to zoom in and check for sharpness of the image on the rear LCD of the camera.
2.6) Use a full-frame cameraA full frame sensor is expensive, but very helpful in low-light situations. The Nikon D700 (FX/Full Frame) has approximately the same amount of noise at ISO 3200 as the Nikon D300 (DX/Cropped sensor) at ISO 800. It truly does make a huge difference in low-light environments. During my last trip to Vegas, I shot many of the images at night hand-held with the D700. If I had a DX sensor, I would have needed a tripod to get similar images, because I was already pushing the low-light capability of the D700 at that point.
2.7) Use a monopod or a tripodAnd last, but not least, try using a monopod or a tripod that will really help with keeping your gear still. A monopod is helpful in some situations, but I personally prefer using a tripod for most of my low-light photography. With a tripod, you could set your ISO to the lowest number to decrease the amount of noise and shoot at very slow shutter speeds. Obviously, slow shutter speeds mean that you would get a lot of motion blur in your images, but in some cases it is not a problem and sometimes it even looks cool! Make sure to use a sturdy tripod, not one of those cheap plastic ones.
3) Low light photography: Dark ConditionsIn poorly lit environments and at night, many of the above tips are useless, because you have no light to work with.
3.1) Use a tripodHand-held photography is simply impossible at night (unless you want to create a really bad-looking effect of motion blur). A good, sturdy tripod is a must for night photography, because you deal with very slow shutter speeds and every vibration matters. It is best to use a remote control or a cable release system with your camera in those situations, but if you do not have one, try using your camera timer. It is not as good of a solution as remote control, because you still have to press the shutter button, which temporarily vibrates the setup. Just use a longer time period for your timer and you should be good to go.
3.2) Use a flashlight for light paintingIf your subject is too dark, use a flash light to add some light to it. Light painting is pretty cool and you can get some really nice shots by painting with the light, especially if you use different colors.
3.3) Use manual focusWhen it is too dark, autofocus will not function. If your subject is close, try to use your “AF Assist” light in the camera to get good focus. If your subject is further away, try using a flashlight to illuminate your subject and allow your camera to focus. If your subject is far away or you do not have a flashlight, you will need to manually focus on your subject. Most of the time, setting your lens to “infinity” focus works great, but in some cases you will have to try to take a picture, then adjust the focus as needed. Once you acquire focus, make sure to turn off autofocus so that the camera does not attempt to focus again. Obviously, do not move your tripod after focus is acquired.
3.4) Do not forget about reciprocityIf you do not know what reciprocity means.
3.5) Practice, practice and practice!I don’t have to say much here – just practice as much as you can and you will get better in no time!
Low-light photography is a lot of fun and you should definitely play and experiment with your camera in different lighting conditions. If you learn how to take pictures in low light, you will have an opportunity to take some amazing pictures that have a different feel to them compared to everyday pictures in daylight :)
Three levels of low-lightBefore we go any further, let’s first identify the varying levels of low-light and categorize them, so that we could refer to them in examples. Although it is very hard to categorize the amount of light, due to the fact that it is a long range of light between very bright and pitch black, just for the sake of making it easier to explain and refer to, I still decided to divide it into three categories:
- Visible: in daylight, when you happen to be in shadow areas behind buildings, under large trees or bridges.
- Low Light: after sunset, when you can still clearly see everything around you, but you can tell that it is getting dark or when you are indoors.
- Dark: at night, when you can only see the brightest objects.
1) Low light photography: Visible ConditionsHave you had a situation where you were in a shadow during the day and tried to take a picture? This was one of my frustrations when I bought my first DSLR, because I couldn’t understand why my pictures were coming out blurry. At times, the images on the rear LCD of the camera would look OK, but when I eventually viewed them on the computer screen, they would all be a little blurry. I had no idea why it was happening and really needed to find out why.
As I later found out, apparently, our eyes can see a much broader range of light, which is known as “dynamic range” in photography, than our cameras do. Therefore, even though you might think that there is plenty of light when you are in a shadow area, in fact, there might be inadequate light for the camera to effectively capture the image. Depending on your camera settings, there might be two consequences: a) you will have a blurry image and b) you might have a lot of noise in your image.
1.1) Shoot at higher shutter speeds to avoid blurry imagesSo, why do blurry images happen? The answer is in the camera shutter speed. If the shutter speed is too low, you will get camera shake and/or motion blur from moving subjects. To avoid camera shake, you should always try to shoot at faster shutter speeds. You might ask “what is a fast shutter speed?”. It depends on the focal length of your lens. If you are photographing a subject with a wide-angle lens between 10-24mm, you might get away with shutter speeds under 1/50th of a second, depending on your camera hand-holding technique. If you are using a telephoto lens longer than 100mm, I recommend applying the hand-holding ruleto calculate your optimal shutter speed. For most day-to-day photography, a shutter speed of 1/200th-1/250th of a second should be fast enough to yield sharp results and avoid motion blur.
1.2) Decrease your aperture to the lowest number (f/stop)But to shoot at fast shutter speeds such as 1/200th of a second means that you need to have plenty of light. In our situation, we don’t have enough light, so what do we do? The first thing you will need to try to do is decrease your lens aperture to the lowest number on the camera. Decreasing your aperture means more light will pass through the lens into the camera body, which will allow you to shoot at faster shutter speeds. In order to do that, you would have to either switch to “Aperture Priority” mode or manually override your aperture in whatever mode you are using. Then, start lowering your aperture till you get to the lowest number your camera will allow.
1.3) Use a faster lensThe lowest number depends on the speed of your lens. Most consumer zoom lenses are limited to f/3.5 for maximum aperture, while professional zoom lenses have an aperture of f/2.8 and some prime (fixed) lenses can go all the way to f/1.2. How will decreasing aperture affect your shutter speed? Let’s say you were shooting at f/8.0 aperture and 1/125th shutter speed. Decreasing aperture to f/5.6 will double your shutter speed to 1/250th of a second, while lowering it to f/4.0 will quadruple the shutter speed to 1/500th of a second, which is plenty to freeze motion. If you have a fast lens with a maximum aperture of f/1.4 or f/1.8, just keep in mind that decreasing the aperture to the lowest number will also decrease the depth of field, so you will have to make sure to acquire correct focus before you take a picture. If you shoot Nikon, I recommend getting one of the following prime lenses, depending on your budget: Nikon 50mm f/1.4G, Nikon 50mm f/1.8Dand Nikon 35mm f/1.8G (DX only). There is a similar selection for Canon Canon cameras: Canon EF 50mm f/1.4 USM, Canon EF 50mm f/1.8 II, Canon EF 28mm f/1.8 USM.
1.4) Use a lens with VR/IS technologyDoes your lens have VR (Vibration Reduction) or IS (Image Stabilization)? If no, that’s too bad, because VR/IS truly does work! The latest “VR II” technology by Nikon can allow you to shoot up to 4 times slower when it comes to shutter speed without adding any blur to the picture (realistically, it’s more like 3 times) compared to non-VR lenses. So, let’s say that with a regular lens you need 1/250th of a second to get a sharp picture. With a VR/IS system, you could lower the shutter speed all the way to 1/30th of a second or more and still get the same sharp image! Many of the consumer zoom lenses such as Nikon 18-55mm f/3.5-5.6G VR and Nikon 18-200mm f/3.5-5.6G VR II come with VR technology. While it is certainly nice to have VR in such versatile lenses, unfortunately, these lenses are also slower and not as sharp as prime lenses such as the Nikon 50mm f/1.4G. Zoom lenses with a fixed aperture and VR/IS technology are professional, expensive lenses such as the Nikon 70-200mm f/2.8G VR II (read my Nikon 70-200mm VR II review) pictured below and are also great choices for low-light photography.
1.5) Increase your camera ISOWhat if you have already decreased your aperture to the lowest number and you are still getting slow shutter speeds? The answer then is to increase the camera ISO (sensor sensitivity), to make the sensor collect light faster. If you are shooting at ISO 100 and your camera is telling you that the shutter speed is 1/25th of a second, you will need to increase your ISO to 400 to get the shutter speed of 1/100th of a second. How did I calculate that? Basically, doubling your ISO doubles your shutter speed. So, increasing the camera ISO from 100 to 200, increases your shutter speed from 1/25th of a second to 1/50th of a second. Then, increasing it further more from 200 to 400 increases the shutter speed from 1/50th of a second to 1/100th of a second. Technically, the shutter speeds in the cameras a little different (1/30th, 1/60th and 1/125th of a second), but I used the above numbers to make it easier to understand. The main thing to remember, is that doubling ISO doubles your shutter speed.
Be careful with increasing your ISO to a big number, as higher sensor sensitivity means that more grain/noise will appear in your images. Most modern cameras can handle noise levels up to ISO 800 pretty well, while top-of-the-line full frame professional cameras can produce very little noise even at ISO 3200 and above.
2) Low light photography: Low Light ConditionsLet’s now move on to a more complex situation, where the amount of light is quickly diminishing after sunset or you are shooting indoors in a poorly lit environment. Obviously, the first thing to try is to decrease your aperture and increase your ISO, as it says above. But then you get to the point where you are maxed out on the aperture and have already reached ISO 800 and you are still not able to get sharp photos. What do you do then?
2.1) Stand closer to the light sourceThe closer you are to the light source, the more light there will be for your camera to use. Large windows are great sources of light, so open up those curtains and blinds and let the light get into the room. I forgot to bring the flashes when we were photographing the below group, so we quickly found a solution by opening up a large gate and letting lots of exterior light in.
2.2) Stabilize yourselfThat’s right – learn to stabilize yourself and hold your camera better. Use your left hand to support the camera by putting it with your palm facing up in between the camera lens and the camera body (or wherever the center of the weight is). Pull your elbows towards your body. If you can, sit down with your right knee on the ground and use your left leg as support by resting your left arm on it. Gently squeeze the shutter button and see if you can get a sharp image. Practice this and other techniques and you will be able to shoot at very low shutter speeds without introducing camera shake.
2.3) Push your ISO to a higher numberWhat is better, a blurry image or a sharp image with more noise? I prefer the latter. Push your ISO to a higher number and take a shot. See if the level of noise is acceptable to you. There are plenty of noise-removal programs out there such as Noise Ninja that can help you clean up an image. Try them out and see if the final result after post-processing is good enough for your needs. Although I personally try to stay below ISO 800, sometimes I push mine to ISO 1600 or even 3200, when needed. On my full-frame Nikon D700 body, I can push up ISO to 6400 every once in a while.
2.4) Shoot in RAW mode and slightly underexposeI personally always shoot in RAW, because I can recover some detail from a picture if I overexpose or underexpose it. With a JPEG image, you have very limited options to recover an image. In some cases, I intentionally underexpose an image by using the exposure compensation button, which increases camera shutter speed. I typically allow 1-1.5 stops of negative exposure compensation…anything above that might not allow me to recover the details I need. Try it – it really works! Some photographers give advice to bracket exposures, but I personally prefer to use exposure compensation instead.
2.5) Be careful about autofocusIn low-light environments, the camera might start to lose its autofocus capabilities. That’s what happens when there is not enough light – the camera cannot differentiate between objects anymore, just like if you were to point it at a plain white wall. Many DSLR cameras are equipped with an “AF assist” light in front of the camera that lights up just like a flashlight when there is not enough light to illuminate the subject. If you have such functionality, definitely turn it on in dim environments. On Nikon DSLRs, switch your camera from continuous mode (“C”) to single (“S”) mode to turn on this feature. When you focus on a subject, make sure that it looks sharp in the viewfinder. If it is blurry, try to re-acquire focus by half-pressing the shutter/autofocus button. In many cases you won’t be able to tell if the camera was able to focus correctly on the subject until you take the picture. In that case, make sure to zoom in and check for sharpness of the image on the rear LCD of the camera.
2.6) Use a full-frame cameraA full frame sensor is expensive, but very helpful in low-light situations. The Nikon D700 (FX/Full Frame) has approximately the same amount of noise at ISO 3200 as the Nikon D300 (DX/Cropped sensor) at ISO 800. It truly does make a huge difference in low-light environments. During my last trip to Vegas, I shot many of the images at night hand-held with the D700. If I had a DX sensor, I would have needed a tripod to get similar images, because I was already pushing the low-light capability of the D700 at that point.
2.7) Use a monopod or a tripodAnd last, but not least, try using a monopod or a tripod that will really help with keeping your gear still. A monopod is helpful in some situations, but I personally prefer using a tripod for most of my low-light photography. With a tripod, you could set your ISO to the lowest number to decrease the amount of noise and shoot at very slow shutter speeds. Obviously, slow shutter speeds mean that you would get a lot of motion blur in your images, but in some cases it is not a problem and sometimes it even looks cool! Make sure to use a sturdy tripod, not one of those cheap plastic ones.
3) Low light photography: Dark ConditionsIn poorly lit environments and at night, many of the above tips are useless, because you have no light to work with.
3.1) Use a tripodHand-held photography is simply impossible at night (unless you want to create a really bad-looking effect of motion blur). A good, sturdy tripod is a must for night photography, because you deal with very slow shutter speeds and every vibration matters. It is best to use a remote control or a cable release system with your camera in those situations, but if you do not have one, try using your camera timer. It is not as good of a solution as remote control, because you still have to press the shutter button, which temporarily vibrates the setup. Just use a longer time period for your timer and you should be good to go.
3.2) Use a flashlight for light paintingIf your subject is too dark, use a flash light to add some light to it. Light painting is pretty cool and you can get some really nice shots by painting with the light, especially if you use different colors.
3.3) Use manual focusWhen it is too dark, autofocus will not function. If your subject is close, try to use your “AF Assist” light in the camera to get good focus. If your subject is further away, try using a flashlight to illuminate your subject and allow your camera to focus. If your subject is far away or you do not have a flashlight, you will need to manually focus on your subject. Most of the time, setting your lens to “infinity” focus works great, but in some cases you will have to try to take a picture, then adjust the focus as needed. Once you acquire focus, make sure to turn off autofocus so that the camera does not attempt to focus again. Obviously, do not move your tripod after focus is acquired.
3.4) Do not forget about reciprocityIf you do not know what reciprocity means.
3.5) Practice, practice and practice!I don’t have to say much here – just practice as much as you can and you will get better in no time!
Low-light photography is a lot of fun and you should definitely play and experiment with your camera in different lighting conditions. If you learn how to take pictures in low light, you will have an opportunity to take some amazing pictures that have a different feel to them compared to everyday pictures in daylight :)
Wedding Photography Essentials
1. Create a ‘Shot List’
One of the most helpful tips I’ve been given about Wedding Photography is to get the couple to think ahead about the shots that they’d like you to capture on the day and compile a list so that you can check them off. This is particularly helpful in the family shots. There’s nothing worse than getting the photos back and realizing you didn’t photograph the happy couple with grandma!
2. Wedding Photography Family Photo Coordinator
I find the family photo part of the day can be quite stressful. People are going everywhere, you’re unaware of the different family dynamics at play and people are in a ‘festive spirit’ (and have often been drinking a few spirits) to the point where it can be quite chaotic. Get the couple to nominate a family member (or one for each side of the family) who can be the ‘director’ of the shoot. They can round everyone up, help get them in the shot and keep things moving so that the couple can get back to the party.
3. Scout the Location
Visit the locations of the different places that you’ll be shooting before the big day. While I’m sure most Pros don’t do this – I find it really helpful to know where we’re going, have an idea of a few positions for shots and to know how the light might come into play. On one or two weddings I even visited locations with the couples and took a few test shots (these made nice ‘engagement photos’).
4. In Wedding Photography Preparation is Key
So much can go wrong on the day – so you need to be well prepared. Have a backup plan (in case of bad weather), have batteries charged, memory cards blank, think about routes and time to get to places and get an itinerary of the full day so you know what’s happening next. If you can, attend the rehearsal of the ceremony where you’ll gather a lot of great information about possible positions to shoot from, the lighting, the order of the ceremony etc
5. Set expectations with the Couple
Show them your work/style. Find out what they are wanting to achieve, how many shots they want, what key things they want to be recorded, how the shots will be used (print etc). If you’re charging them for the event, make sure you have the agreement of price in place up front.
6. Turn off the sound on your Camera
Beeps during speeches, the kiss and vows don’t add to the event. Switch off sound before hand and keep it off.
7. Shoot the small details
Photograph rings, backs of dresses, shoes, flowers, table settings, menus etc – these help give the end album an extra dimension. Flick through a wedding magazine in a news stand for a little inspiration.
8. Use Two Cameras
Beg, borrow, hire or steal an extra camera for the day – set it up with a different lens. I try to shoot with one wide angle lens ( I prefer my Tamron 17-50 F2.8 )(great for candid shots and in tight spaces )(particularly before the ceremony in the preparation stage of the day) and one longer lens (it can be handy to have something as large as 200mm if you can get your hands on one – I use a 70-200mm).
9. Consider a Second Wedding Photographer
Having a second backup photographer can be a great strategy. It means less moving around during ceremony and speeches, allows for one to capture the formal shots and the other to get candid shots. It also takes a little pressure off you being ‘the one’ to have to get every shot!
10. Be Bold but Not Obtrusive
Timidity won’t get you ‘the shot’ – sometimes you need to be bold to capture a moment. However timing is everything and thinking ahead to get in the right position for key moments are important so as not to disrupt the event. In a ceremony I try to move around at least 4-5 times but try to time this to coincide with songs, sermons or longer readings. During the formal shots be bold, know what you want and ask for it from the couple and their party. You’re driving the show at this point of the day and need to keep things moving.
11. Learn how to Use Diffused Light
The ability to bounce a flash or to diffuse it is key. You’ll find that in many churches that light is very low. If you’re allowed to use a flash (and some churches don’t allow it) think about whether bouncing the flash will work (remember if you bounce off a colored surface it will add a colored cast to the picture) or whether you might want to buy a flash diffuser to soften the light. If you can’t use a flash you’ll need to either use a fast lens at wide apertures and/or bump up the ISO. A lens with image stabilization might also help.
12. Shoot in RAW
I know that many readers feel that they don’t have the time for shooting in RAW (due to extra processing) but a wedding is one time that it can be particularly useful as it gives so much more flexibility to manipulate shots after taking them. Weddings can present photographers with tricky lighting which result in the need to manipulate exposure and white balance after the fact – RAW will help with this considerably.
13. Display Your Shots at the Reception
One of the great things about digital photography is the immediacy of it as a medium. One of the fun things I’ve seen more and more photographers doing recently is taking a computer to the reception, uploading shots taken earlier in the day and letting them rotate as a slideshow during the evening. This adds a fun element to the night.
14. Consider Your Backgrounds
One of the challenges of weddings is that there are often people going everywhere – including the backgrounds of your shots. Particularly with the formal shots scope out the area where they’ll be taken ahead of time looking for good backgrounds. Ideally you’ll be wanting uncluttered areas and shaded spots out of direct sunlight where there’s unlikely to be a wandering great aunt wander into the back of the shot.
15. Don’t Discard Your ‘Mistakes’
The temptation with digital is to check images as you go and to delete those that don’t work immediately. The problem with this is that you might just be getting rid of some of the more interesting and useable images. Keep in mind that images can be cropped or manipulated later to give you some more arty/abstract looking shots that can add real interest to the end album.
16. Change Your Perspective
Get a little creative with your shots. While the majority of the images in the end album will probably be fairly ‘normal’ or formal poses – make sure you mix things up a little by taking shots from down low, up high, at wide angles etc.
17. Wedding Group Shots
One thing that I’ve done at every wedding that I’ve photographed is attempt to photograph everyone who is in attendance in the one shot. The way I’ve done this is to arrange for a place that I can get up high above everyone straight after the ceremony. This might mean getting tall ladder, using a balcony or even climbing on a roof. The beauty of getting up high is that you get everyone’s face in it and can fit a lot of people in the one shot. The key is to be able to get everyone to the place you want them to stand quickly and to be ready to get the shot without having everyone stand around for too long. I found the best way to get everyone to the spot is to get the bride and groom there and to have a couple of helpers to herd everyone in that direction.
18. Fill Flash
When shooting outside after a ceremony or during the posed shots you’ll probably want to keep your flash attached to give a little fill in flash. I tend to dial it back a little (a stop or two) so that shots are not blown out – but particularly in backlit or midday shooting conditions where there can be a lot of shadow, fill in flash is a must.
19. Continuous Shooting Mode
Having the ability to shoot a lot of images fast is very handy on a wedding day so switch your camera to continuous shooting mode and use it. Sometimes it’s the shot you take a second after the formal or posed shot when everyone is relaxing that really captures the moment!
20. Expect the Unexpected
One more piece of advice that someone gave me on my own wedding day. ‘Things will Go Wrong – But They Can be the Best Parts of the Day’. In every wedding that I’ve participated in something tends to go wrong with the day. The best man can’t find the ring, the rain pours down just as the ceremony ends, the groom forgets to do up his fly, the flower girl decides to sit down in the middle of the aisle or the bride can’t remember her views….
These moments can feel a little panicky at the time – but it’s these moments that can actually make a day and give the bride and groom memories. Attempt to capture them and you could end up with some fun images that sum up the day really well.
I still remember the first wedding I photographed where the bride and grooms car crashed into a Tram on the way to the park where we were going to take photos. The bride was in tears, the groom stressed out – but after we’d all calmed down people began to see some of the funny side of the moment and we even took a couple of shots before driving on to the park. They were among everyone’s favorites.

Candid Photography Essentials
Candid styles of photography are increasingly becoming popular both in general day to day photography but also in formal photographic situations. Last time I was asked to photograph a wedding the couple actually hired me purely to take paparazzi style shows of them and their guests throughout the day. They had another photographer for the formal shots and gave me the brief of getting a behind the scenes look of the day.
The results, when they put together my shots with the formal ones were a wonderful blend of photos that told a fuller story than if they’d gone for one or the other.
Below are a number of tips to help photographers improve their ‘candid’ photography. Please note that these tips are not about taking sneaky, voyeuristic or true paparazzi shots (ie photographing people without their permission) but rather about how to add a more candid feel to the shots you take of people that you know.
1. Take your Camera Everywhere
Probably the best way to take spontaneous photographs is to always be ready to do so. I have a DSLR which I take out when I’m on a shoot but between shoots like to cary with a quality point and shoot camera that I can whip out at a moments notice to capture the many opportunities for a good photo that life presents us with. Taking your camera with you everywhere also helps people to be more at ease with you taking their photo. I find that my friends and family just expect me to have my camera out so when I do fire it up it’s not a signal to them to pose but it’s a normal part of our interaction – this means that they are relaxed and the photos are natural.
2. Use a Long Zoom
Obviously the further you are away from your subject the less likely they will be to know that you’re photographing them and the more natural and relaxed they’ll act. Using a telephoto lens or long zoom enables you to shoot from outside their personal space but keep the feeling of intimacy in the shot you’re taking.
3. Kill the Flash
Perhaps the most obvious way that you can signal to another person that you’re photographing them is to use a flash. There’s nothing like a blinding flash of light in the eyes to kill a moment. If possible (and it’s not always) attempt to photograph without the flash if you’re aiming for candid shots. When in lower light situations increase your ISO setting, use a faster lens, open up your aperture or if your camera has a ‘natural light mode’ turn it on. Hopefully one or a combination of these approaches will help you blend into the background a little more.
4. Shoot lots
I’ve written about this before on this site but when you shoot multiple images quickly of a person you can sometimes get some surprising and spontaneous shots that you’d have never gotten if you shot just one. Switch your camera to continuous shooting mode and shoot in bursts of images and in doing so you’ll increase your chances of that perfect shot.
5. Position Yourself strategically
While Candid Photography is about capturing the spontaneity of a moment and getting that perfect shot at the right split second of time I find that if you think ahead and anticipate what is about to unfold in front of you that you can greatly increase the chances of getting some great shots. So at a wedding get to the church early (or even go to the rehearsal) and think about what will happen during the ceremony and where will be best for you to stand to capture each moment. Which way will people be facing? What will they be doing? What will the light be like? Thinking through these issues will save you having to run around repositioning yourself when you should be shooting images – it’ll also mean you take a whole heap less shots of the back of people’s heads!
6. Photograph People Doing things
Images of people doing things tend to be much more interesting than people sitting passively doing nothing. For one your subject will be focussed upon something which adds energy to a photo (and takes their focus off you) but it also puts them in context and adds an element of story to your image. Timing is everything in Candid shots so wait until they are distracted from you and fully focussed upon what they are doing or who they are with and you’ll inject a feeling into your shots of them being unaware and that the viewer of your image is looking on unseen.
7. Photograph People with People
Something very interesting happens when you photograph more than one person in an image at a time – it introduces relationship into the shot. Even if the two (or more) people are not really interacting in the shot it can add depth and a sense of story into the viewing of the image. Of course ideally in candid shots you’d like some interaction between your subjects as that will add emotion into the shot also as we the viewer observe how the people are acting.
8. Shoot from the Hip
If your subject is aware that you’re there and that you have your camera out they might tense up or act a little unnaturally as they see you raising your camera to the eye. The beauty of digital cameras is that it doesn’t cost you anything to take lots of shots and it can be well worth shooting without raising your camera. To do this most effectively you might want to set your lens to a wider angle setting to make up for any aiming problems you might have.
9. Mix up your Perspective
The other beauty of shooting from the hip is that it gives you a slightly different perspective to take the shot from (ie shooting from 3 feet height instead of 6). This adds to the candid nature of the shots. In fact sometimes it’s the slightly crooked, slightly out of focus or poorly composed shots taken from this type of angle that ends up looking the best because they come across as quite random. Of course you can add all these new perspectives to your shots without shooting from the hip. Crouch down, get up high, frame your shots on an angle, zoom in close and then quickly zoom out to a wide angle, break the rules of composition etc and you will add a new perspective to your shots that can mean they look fresh and surprising.
10. Frame Images with Foreground Elements
A trick that I often use in candid shots is to purposely include something in the foreground of the shot to make it look as though I’m hiding behind it. You might do this with by shooting over someone’s shoulder, by including a little of a tree branch or the frame of a doorway.
11. Take Posed Shots into Candid Territory
One of my favorite times to shoot candid shots is when other people are taking formal ones. This is because everyone in the shot is focused on the one element (the other photographer) – but it’s not you. If the main photographer has posed the happy couple of the day or their bridal partly look for a different angle to them to take a shot of the same subject. Often if you take a few steps to the side and shoot from almost a profile position you can get great shots. Also zooming in to take shots of just one or two of the people in a larger group at these times can work well. Also try zooming right out to take a shot of the photographer and their subject all in one. If you’re the only photographer and you’re taking formal shots a great technique is to take your posed shot and then continue to shoot after everyone thinks you’ve finished. It’s often the shots just after the posed one that are the best as people relax and look at each other.
Good luck and let me know if you have any questions ask free at [email protected]
